Microcontrollers are everywhere. From your coffee maker to your car, they play a crucial role in the devices we use every day. Understanding microcontroller basics is essential for anyone looking to dive into the world of programmable electronics. This guide will break down what microcontrollers are, how they work, and how you can start using them in your projects.
What is a Microcontroller?
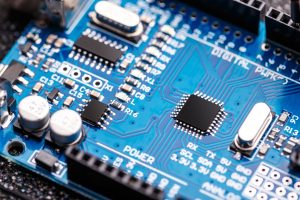
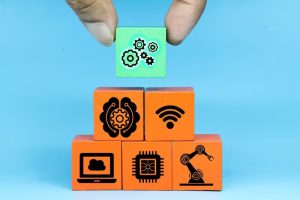
At its core, a microcontroller is a small computer on a single integrated circuit (IC). It contains a processor, memory, and input/output (I/O) peripherals. Microcontrollers are designed to perform specific tasks, making them ideal for embedded systems.
Think of them as the brains of electronic devices. They receive input, process it, and produce output. This simple yet powerful functionality makes microcontrollers versatile tools for hobbyists and professionals alike.
Key Components of a Microcontroller
To understand microcontroller basics, it’s essential to know its key components:
-
Central Processing Unit (CPU): The CPU is the heart of the microcontroller. It executes instructions and performs calculations. The speed of the CPU is measured in megahertz (MHz) or gigahertz (GHz).
-
Memory: Microcontrollers have two types of memory: volatile and non-volatile. Volatile memory (like RAM) is temporary and loses its data when the power is off. Non-volatile memory (like Flash) retains data even when powered down.
-
Input/Output (I/O) Ports: These ports allow the microcontroller to interact with the outside world. They can read inputs from sensors or control outputs like motors and lights.
-
Timers and Counters: These components help in measuring time intervals and counting events. They are crucial for tasks like generating precise delays or measuring frequency.
-
Analog-to-Digital Converter (ADC): The ADC converts analog signals (like temperature or light levels) into digital data that the microcontroller can process.
-
Communication Interfaces: Microcontrollers often include interfaces like UART, SPI, and I2C for communication with other devices. These enable data exchange between the microcontroller and other components or systems.
Why Use Microcontrollers?
Microcontrollers offer several advantages:
-
Cost-Effective: They are relatively inexpensive, making them accessible for hobbyists and small projects.
-
Low Power Consumption: Microcontrollers are designed to be energy-efficient, which is essential for battery-powered devices.
-
Versatility: They can be programmed to perform various tasks, from simple automation to complex data processing.
-
Compact Size: Their small footprint allows for integration into various devices without taking up much space.
These benefits make microcontrollers an excellent choice for both beginners and experienced developers looking to create innovative solutions.
Getting Started with Microcontrollers
If you’re new to microcontrollers, here’s a simple roadmap to get started:
1. Choose the Right Microcontroller
There are many microcontroller families, such as Arduino, PIC, and AVR. For beginners, Arduino is often recommended due to its user-friendly platform and extensive community support. Arduino boards come with a built-in USB interface for easy programming and debugging.
2. Learn the Basics of Programming
Microcontrollers are programmed using specific languages. Arduino uses a simplified version of C/C++. Familiarize yourself with basic programming concepts like variables, loops, and functions. Numerous online resources and tutorials can help you learn these skills.
3. Get the Necessary Tools
To start programming your microcontroller, you’ll need:
-
A Microcontroller Board: An Arduino board is a great starting point.
-
USB Cable: This connects your board to your computer for programming.
-
IDE (Integrated Development Environment): Arduino IDE is free and easy to use. It allows you to write, compile, and upload your code to the board.
4. Start with Simple Projects
Begin with simple projects that involve basic I/O operations, such as blinking an LED or reading a temperature sensor. These projects will help you understand microcontroller basics and build your confidence.
5. Explore Advanced Topics
Once you’re comfortable with the basics, explore more complex projects. This might include using communication protocols to connect multiple devices or implementing real-time data processing. The possibilities are endless!
Programming a Microcontroller
The Programming Process
Programming a microcontroller involves writing code that tells it what to do. The process typically includes:
-
Writing the Code: Use the IDE to write your program. This code will include instructions for the microcontroller to follow.
-
Compiling the Code: Compile the code to check for errors. The IDE will convert your code into machine language that the microcontroller can understand.
-
Uploading the Code: Once the code is error-free, upload it to the microcontroller using the USB connection.
-
Testing and Debugging: After uploading, test your project. If something isn’t working, debug your code by checking for errors or issues in the wiring.
Applications of Microcontrollers
Microcontrollers are used in a wide range of applications. Here are some popular ones:
1. Home Automation
Microcontrollers can control various home appliances, such as lights, thermostats, and security systems. You can create smart home systems that enhance convenience and energy efficiency.
2. Robotics
In robotics, microcontrollers serve as the brains of robots. They process inputs from sensors and control motors to perform tasks like navigating a space or picking up objects.
3. Automotive Systems
Microcontrollers are integral to modern vehicles, managing functions like engine control, airbag deployment, and infotainment systems. They enhance safety, performance, and user experience.
4. Medical Devices
In healthcare, microcontrollers are used in devices like blood glucose meters, heart rate monitors, and infusion pumps. They help in monitoring and controlling medical treatments and diagnostics.
5. Consumer Electronics
Many consumer products, such as cameras, gaming consoles, and appliances, rely on microcontrollers for their functionality. They enable features like user interfaces, signal processing, and connectivity.
Challenges in Working with Microcontrollers
While microcontrollers are powerful tools, they come with challenges:
1. Learning Curve
For beginners, the learning curve can be steep. Understanding hardware and software integration takes time and practice. However, numerous resources and communities can help you along the way.
2. Debugging Issues
Debugging can be challenging, especially when working with complex projects. Carefully checking your code and connections is crucial to identifying issues.
3. Limited Resources
Microcontrollers have limited processing power and memory compared to larger computers. This limitation requires efficient programming and resource management.
4. Component Compatibility
When building projects, ensuring that all components are compatible with your microcontroller is essential. Researching and selecting the right sensors, actuators, and modules can save you time and frustration.
Future of Microcontrollers
The future of microcontrollers looks bright. As technology advances, microcontrollers are becoming more powerful, compact, and energy-efficient. Emerging trends include:
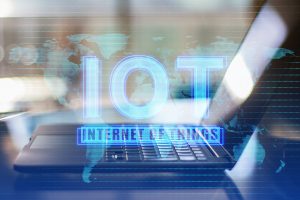
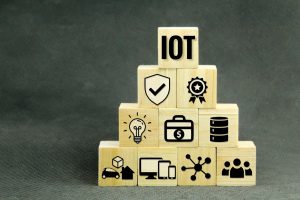
1. Internet of Things (IoT)
Microcontrollers are at the heart of IoT devices. They enable connectivity and data processing for smart home devices, wearables, and industrial applications.
2. Artificial Intelligence (AI)
Integrating AI capabilities into microcontrollers allows for smarter and more adaptive devices. This trend will enable microcontrollers to perform complex tasks and learn from their environment.
3. Enhanced Connectivity
With the rise of 5G technology, microcontrollers will benefit from faster and more reliable connectivity. This improvement will enhance the performance of IoT applications and allow for more sophisticated communication between devices.
Conclusion
Understanding microcontroller basics is essential for anyone interested in programmable electronics. These small yet powerful devices are the backbone of countless applications, from home automation to medical devices. By learning about their components, programming, and applications, you can unlock a world of possibilities. Whether you’re a hobbyist or a professional, mastering microcontrollers will equip you with the skills to innovate and create.
FAQs
1. What are microcontrollers used for?
Microcontrollers are used in a wide range of applications, including home automation, robotics, automotive systems, medical devices, and consumer electronics. They act as the brains of these devices, processing inputs and controlling outputs.
2. How do I start programming a microcontroller?
To start programming a microcontroller, choose a suitable board like Arduino. Learn the basics of programming in languages like C/C++. Use an IDE to write, compile, and upload your code to the microcontroller.
3. What is the difference between a microcontroller and a microprocessor?
A microcontroller is a compact integrated circuit designed to perform specific tasks, including CPU, memory, and I/O ports. In contrast, a microprocessor is a more powerful computing unit that requires external components for memory and I/O operations.
4. Are microcontrollers energy-efficient?
Yes, microcontrollers are designed to be energy-efficient, making them ideal for battery-powered applications. Their low power consumption helps extend battery life, essential for portable devices.
5. Can I use a microcontroller for IoT projects?
Absolutely! Microcontrollers are fundamental to IoT projects. They enable connectivity and data processing, allowing devices to communicate and interact with each other in smart environments.